
Monetize Your Website: Why Preparation Comes Before Profit
Most people rush into making money from their website. They add ads or links, then wait for the income to arrive. However, a site that isn’t prepared often loses visitors’ trust or earns almost nothing.
To monetize a website simply means to earn money from it. This checklist walks you through ten steps to complete before you place a single ad, link, or price tag. It works whether you plan to show ads, promote other companies’ products, or sell your own offers.
Key Takeaways
- Choose your monetization method first, because it decides what the rest of your preparation looks like.
- Useful content and a trustworthy site matter more than raw traffic numbers at this stage.
- Legal pages, analytics, and payment setup feel boring, but they are non-negotiable.
- An email list gives you an audience you own, which makes every method work better.
- A final test on your phone catches problems before your visitors do.
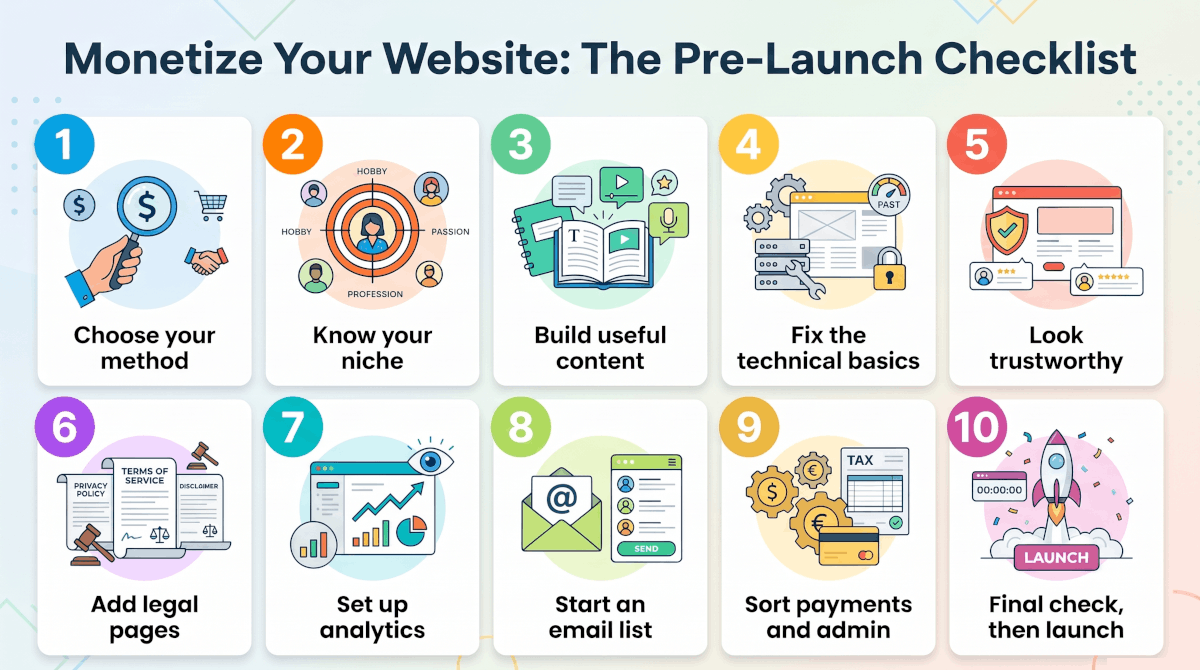
Your 10-step pre-launch checklist at a glance to Monitize Your Website.
Step 1: How Are You Going To Monetize Your Website
Before you fix anything, pick your main way of earning. Each option needs different preparation, so this choice shapes every step that follows. For example, ads need steady traffic (the number of people visiting your site), while coaching or digital products need a clear offer and a trusting audience.
The most common options are:
- Ads: You join an ad network, which is a company that places ads on your site and pays you when visitors see or click them.
- Affiliate links: These are special links to other companies’ products, and they pay you a commission when someone buys through them.
- Digital products: These include e-books, templates, or courses that you create and sell.
- Services: Coaching or consulting means you are paid for your time and expertise.
- Memberships: Visitors pay a subscription for extra content or a community.
Start with one or two of these. Trying everything at once splits your focus and clutters your pages. If you’re unsure which path suits you, compare the options in our guide on how to monetize a one-person business.
.
Step 2: Get Clear On Your Niche And Your Target Audience
A niche is the specific topic your site focuses on. Every monetized site needs a clear one. Ask yourself who the site serves and which problem it solves. Advertisers, affiliate programs, and customers all respond better to a focused site than to a random collection of posts. In addition, a clear topic attracts a specific audience, and specific audiences are far easier to monetize.
Write one sentence that describes your site: “This site helps [who] do [what].” If you can’t finish it easily, tighten your focus before moving on. Then check that your existing pages support that sentence. Pages that drift off-topic can be merged, improved, or removed.
Build a Foundation of Useful Relevant Content
Ad networks and buyers judge your site by what it contains. Therefore, aim for a solid library of helpful, original articles before you apply anywhere. A common rule of thumb is around 20 quality posts, although the exact number varies. Still, quality beats quantity every time.
Check each page against a few simple questions:
- Does it answer a real question clearly?
- Is it original rather than copied or lightly reworded?
- Is the information accurate and up to date?
- Does it use clear headings and short paragraphs?
Because Google rewards helpful content, this step also improves your search traffic. More traffic in turn means more potential income once you switch monetization on.
Step 4: Fix the Technical Basics.
A slow or broken site drives visitors away, and it can also get you rejected by ad networks. Fortunately, most technical problems are easy to find. Start with these checks:
- Speed: Go to Google PageSpeed Insights, paste your web address into the box, and click Analyze. Fix the biggest issues first, such as oversized images. Slow web hosting can also be the cause.
- Mobile: Open your site on your phone and confirm that text, menus, and buttons work properly.
- Security: Look at the start of your web address in your browser. It should begin with https:// rather than http://. If your browser says “Not secure”, ask your web host to switch on an SSL certificate, which is the setting that enables https. Our guide to protecting your website covers further steps.
- Broken links: Use an SEO plugin or a free online link checker to scan for dead links, which are links that lead to an error page. Also test your contact form by sending yourself a message.
- Search visibility: Go to Google Search Console and sign in with a Google account. Click Add property, enter your web address, and follow the steps to prove you own the site. Later, check that your key pages are indexed, which means Google has stored them so they can appear in search results.
Bear in mind that ads add weight to every page. So a site that is only just fast enough today will feel sluggish once monetized. Build in some headroom.
Step 5: Make Your Website Look Trustworthy

People rarely pay, click, or sign up on a site they don’t trust. In addition, ad networks and affiliate programs review these trust signals before they approve you. Make sure your site includes:
- An About page that shows who runs the site and why they are qualified
- A Contact page with a working email address or form
- Clear navigation, so visitors can reach key pages within a few clicks
- A consistent design that looks professional on every device
- Real author names and short bios on your articles
Trust also comes from small details. For example, fix typos, remove outdated pages, and avoid pop-ups that block the content. Visitors notice these things, even when they can’t explain why a site feels reliable.
Step 6: Add All Legal Pages Before You Monetize Your Website
Legal pages are the pages most sites link together in the footer, which is the strip at the very bottom of every page. They protect you and your visitors, and some are essential before you earn anything. Here is what to add:
- Privacy Policy: Almost every website needs one. It explains what data you collect, such as through analytics, comments, or email sign-ups. Privacy laws such as GDPR follow the visitor rather than the site owner, and Google’s advertising and analytics products also require one.
- Cookie policy and consent banner: Cookies are small files that track visits. A short pop-up asks visitors to accept them, and you usually need one when you use analytics or ads and have visitors from the UK or Europe.
- Affiliate Disclosure: This tells readers you earn a commission when they buy through your links. Many places legally require it, and affiliate programs usually do as well.
- Terms of Service: These are usually not mandatory, but they protect you, especially if you sell products, take comments, or cover health, money, or legal topics. Include your refund terms if you sell anything.
- Disclaimer: This is also usually optional. It states that your content is general information rather than professional advice.
Place your affiliate disclosure where readers see it before they click a link, not only in the footer. This article gives general information, not legal advice, so check the details for your own situation.
Step 7: Set Up Analytics and Tracking

You can’t improve what you don’t measure. Moreover, most advertisers and partners will ask for your traffic figures before they work with you.
Start with an analytics tool, which counts your visitors and shows what they do on your site. Google Analytics is a free option. Create an account, follow the setup steps, and add the small tracking code it gives you to your site. If your site runs on WordPress, an SEO or analytics plugin usually has a settings box where you paste it. Then use Search Console, which you set up in Step 4, to see which search terms bring people to your site. Together, these tools show you which content deserves the most monetization effort.
Also, track a few simple actions, such as email sign-ups, link clicks, or visits to a product page. That way you will know from day one what works. Finally, record your starting numbers now, so you can measure the real impact of monetization later.
Step 8: Start Building Your Email List
Search traffic can drop overnight, and social platforms change their rules without warning. An email list is the one audience you truly own. As a result, it makes nearly every monetization method more reliable.
Set up a simple sign-up form with a clear promise and clear consent wording. For instance, offer a free checklist, a short guide, or a weekly tip in exchange for an email address. Place the form in your header or sidebar, at the end of your best articles, and on your About page. Then send a welcome message that introduces you and points to your most useful content. Our guide on how to build an email list covers the setup in detail.
Even a small list of engaged subscribers can outperform a large but distracted audience. So start collecting addresses now, well before you need them.
Step 9: Get Payments and Business Admin in Order
If you plan to sell anything, you need a way to get paid. Even ad and affiliate income has to land somewhere, so set up the basics early:
- Payment provider: This is a service that takes card payments for you. Open an account, then test a small purchase.
- Bank account: Consider a separate business account to keep income and expenses tidy.
- Tax and registration: Check whether you need to register as self-employed or as a business where you live, because rules differ by country.
- Records: Start a simple spreadsheet to track income and costs from day one.
It’s tempting to leave the admin until the money arrives. However, sorting it out now means the first sale feels like a win instead of a headache.
Step 10: Run a Final Check Before You Monetize Your Website
Finally, test everything as a visitor would. Open your site in a private browser window and walk through it on both a phone and a computer. Use this last checklist:
- Every page loads quickly and looks right on mobile
- Your privacy policy, cookie banner, and disclosures are live
- Analytics and Search Console are recording data
- Your email sign-up form works, and the welcome message arrives
- Your payment provider completes a test transaction
- Your best content is easy to find
Then introduce monetization gradually. For example, add one ad or one affiliate recommendation, watch how visitors respond, and expand from there. This slower approach protects the user experience. It also shows you what works before you commit fully.
Quick Recap; Your Launch Checklist
Here is the whole checklist in one place:
- Decide on your main monetization method.
- Get clear on your niche and your reader.
- Build a foundation of useful, original content.
- Fix speed, mobile, security, and broken links.
- Add trust signals such as an About page and contact details.
- Publish your legal pages and disclosures.
- Set up analytics and record your starting numbers.
- Start building an email list.
- Get payments and business admin in order.
- Test everything, then introduce monetization gradually.
Frequently Asked Questions
When is a website ready to monetize?
A website is ready when it has useful content, a clear audience, a sound technical foundation, and the legal and tracking basics in place. Traffic helps, but readiness depends on all of these together, not on one number.
Can I monetize a website with no traffic?
In some ways, yes. Selling your own services or products doesn’t require huge traffic, although you still need a way to reach potential buyers. Ads, on the other hand, usually need steady traffic to earn meaningful income. Either way, preparing your site first gives you a head start.
How much traffic do I need before earning money from a website?
There is no universal number. Some ad networks set minimums, while affiliate programs, coaching, and product sales often don’t. Focus on attracting the right visitors rather than chasing a figure. A small, engaged audience can earn more than a large, indifferent one.
Do I need a privacy policy before earning money from my site?
Yes. Almost every website needs one, because privacy laws such as GDPR follow the visitor rather than the site owner. Google’s advertising and analytics products also require one, and so do most ad networks and affiliate programs. Check the details for your own situation.
How many blog posts do I need before applying to an ad network?
There is no magic number, and requirements vary from one network to the next. A common rule of thumb is around 20 quality posts, but the standard matters more than the count. Original, helpful content, a professional design, and clear contact details all count. Check the network’s current requirements before you apply.
Should I build an email list first?
Ideally, yes. An email list gives you a direct line to your audience, whatever happens to your search rankings. It also makes launching a product or service far easier, because you already have people who want to hear from you.
Will ads or affiliate links hurt my Google rankings?
Not by themselves. However, too many intrusive ads slow your pages and frustrate visitors, and that can hurt. Google also recommends telling search engines which links are paid or affiliate links, using a link setting called “sponsored”. Above all, make sure every page still offers real value beyond the links.
Over to You
Getting your site ready takes a little patience, but it pays off once the income starts. Which of these ten steps are you tackling first? Share your answer in the comments below.
